


准备篇:
1、配置防火墙,开启80端口、3306端口
说明:Ubuntu默认安装是没有开启任何防火墙的,为了服务器的安全,建议大家安装启用防火墙设置,这里推荐使用iptables防火墙。
whereis iptables #查看系统是否安装防火墙
iptables: /sbin/iptables /usr/share/iptables /usr/share/man/man8/iptables.8.gz #表示已经安装iptables
apt-get install iptables #如果默认没有安装,请运行此命令安装防火墙
iptables -L #查看防火墙配置信息,显示如下:
系统运维 www.osyunwei.com 温馨提醒:qihang01原创内容版权所有,转载请注明出处及原文链接
#####################################################
Chain INPUT (policy ACCEPT)
target prot opt source destination
Chain FORWARD (policy ACCEPT)
target prot opt source destination
Chain OUTPUT (policy ACCEPT)
target prot opt source destination
#####################################################
nano /etc/iptables.default.rules #添加以下内容
##################################################################################################
*filter
# Allows all loopback (lo0) traffic and drop all traffic to 127/8 that doesn't use lo0
-A INPUT -i lo -j ACCEPT
# Accepts all established inbound connections
-A INPUT -m state --state ESTABLISHED,RELATED -j ACCEPT
# Allows all outbound traffic
# You could modify this to only allow certain traffic
-A OUTPUT -j ACCEPT
# Allows HTTP and MySQLconnections from anywhere (the normal ports for websites)
-A INPUT -p tcp --dport 80 -j ACCEPT
-A INPUT -p tcp --dport 3306 -j ACCEPT
# Allows SSH connections for script kiddies
# THE -dport NUMBER IS THE SAME ONE YOU SET UP IN THE SSHD_CONFIG FILE
-A INPUT -p tcp -m state --state NEW --dport 22 -j ACCEPT
# Now you should read up on iptables rules and consider whether ssh access
# for everyone is really desired. Most likely you will only allow access from certain IPs.
# Allow ping
-A INPUT -p icmp -m icmp --icmp-type 8 -j ACCEPT
# log iptables denied calls (access via 'dmesg' command)
-A INPUT -m limit --limit 5/min -j LOG --log-prefix "iptables denied: " --log-level 7
# Reject all other inbound - default deny unless explicitly allowed policy:
-A INPUT -j REJECT
-A FORWARD -j REJECT
COMMIT
##################################################################################################
ctrl+o #保存
ctrl+x #退出
系统运维 www.osyunwei.com 温馨提醒:qihang01原创内容版权所有,转载请注明出处及原文链接
备注:80是指web服务器端口、3306是指MySQL数据库链接端口、22是指SSH远程管理端口
iptables-restore < /etc/iptables.default.rules #使防火墙规则生效
nano /etc/network/if-pre-up.d/iptables #创建文件,添加以下内容,使防火墙开机启动
##########################################################
#!/bin/bash
/sbin/iptables-restore </etc/iptables.default.rules
##########################################################
chmod +x /etc/network/if-pre-up.d/iptables #添加执行权限
2、添加nginx Ubuntu apt-get源(说明:Ubuntu的apt标准源中提供的nginx版本比较低)
cp /etc/apt/sources.list /etc/apt/sources.listbak #备份原有配置文件
nano /etc/apt/sources.list #编辑,在原有的源上面添加以下代码:
deb http://nginx.org/packages/ubuntu/ lucid nginx
deb-src http://nginx.org/packages/ubuntu/ lucid nginx
ctrl+o #保存
ctrl+x #退出
wget http://nginx.org/packages/keys/nginx_signing.key #下载签名证书
cat nginx_signing.key | apt-key add - #添加证书
apt-get update #更新系统
apt-get upgrade #更新软件包
安装篇
一、安装Nginx
apt-get install nginx #安装nginx,根据提示输入y安装
service nginx start #启动nginx
apt-get install chkconfig #安装chkconfig
chkconfig nginx on #添加开机启动
二、安装MySQL
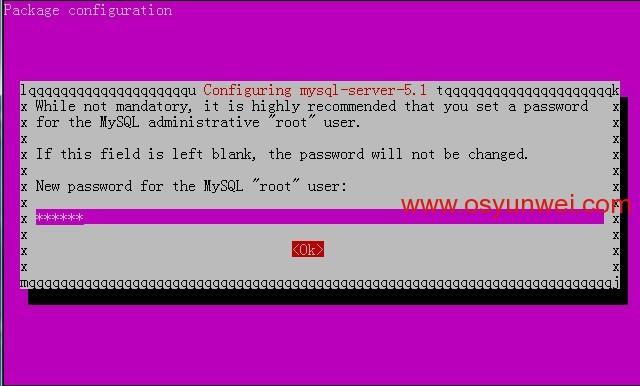
apt-get install mysql-server #安装mysql,根据提示输入y安装
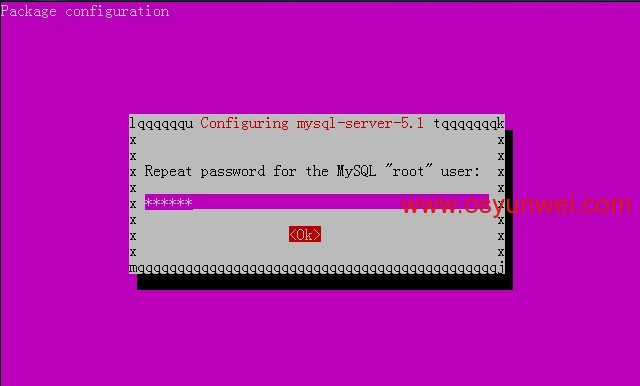
安装过程中,会跳出输入root密码的界面
输入2次密码,继续自动安装
service mysql start #启动
chkconfig mysql on #开机启动mysql
service mysql restart #重启
三、安装PHP以及组件、使php的FastCGI模式
apt-get install php5-fpm php5-cgi php5-cli php5-curl php5-mysql php5-gd libjpeg8-dev php5-imap php5-ldap php5-odbc php*-pear php5-mcrypt php5-mhash libmcrypt* libmcrypt-dev php5-common php5-idn php5-imagick php5-memcache php5-ming php5-ps php5-pspell php5-recode php5-snmp php5-sqlite php5-tidy php5-xmlrpc php5-xsl php5-json php5-suhosin php-apc php5-dev
/etc/init.d/php5-fpm start #启动php5-fpm
chkconfig php5-fpm on #设置开机启动php5-fpm
/etc/init.d/mysql restart #重启mysql
/etc/init.d/nginx restart #重启nginx
ln -s /etc/php5/fpm/php.ini /etc/php.ini #把php配置文件链接到系统默认位置
配置篇
一、配置nginx支持php
cp /etc/nginx/nginx.conf /etc/nginx/nginx.confbak #备份原有配置文件
nano /etc/nginx/nginx.conf #编辑
user www-data www-data; #修改nginx运行账号为:www-data组的www-data用户
ctrl+o #保存
ctrl+x #退出
#######################################################################################
cp /etc/nginx/conf.d/default.conf /etc/nginx/conf.d/default.confbak #备份原有配置文件
nano /etc/nginx/conf.d/default.conf #编辑
index index.php index.html index.htm; #增加index.php
# pass the PHP scripts to FastCGI server listening on 127.0.0.1:9000
#
location ~ \.php$ {
root html;
fastcgi_pass 127.0.0.1:9000;
fastcgi_index index.php;
fastcgi_param SCRIPT_FILENAME /usr/share/nginx/html$fastcgi_script_na$
include fastcgi_params;
}
#取消FastCGI server部分location的注释,并要注意fastcgi_param行的参数,改为/usr/share/nginx/html$fastcgi_script_name;使用网站目录绝对路径
ctrl+o #保存
ctrl+x #退出
#######################################################################################
系统运维 www.osyunwei.com 温馨提醒:qihang01原创内容版权所有,转载请注明出处及原文链接
二、配置php
nano /etc/php.ini #编辑
date.timezone = PRC #在946行 把前面的分号去掉,改为date.timezone = PRC
disable_functions = passthru,exec,system,chroot,scandir,chgrp,chown,shell_exec,proc_open,proc_get_status,ini_alter,ini_alter,ini_restore,dl,openlog,syslog,readlink,symlink,popepassthru,stream_socket_server,escapeshellcmd,dll,popen,disk_free_space,checkdnsrr,checkdnsrr,getservbyname,getservbyport,disk_total_space,posix_ctermid,posix_get_last_error,posix_getcwd, posix_getegid,posix_geteuid,posix_getgid, posix_getgrgid,posix_getgrnam,posix_getgroups,posix_getlogin,posix_getpgid,posix_getpgrp,posix_getpid, posix_getppid,posix_getpwnam,posix_getpwuid, posix_getrlimit, posix_getsid,posix_getuid,posix_isatty, posix_kill,posix_mkfifo,posix_setegid,posix_seteuid,posix_setgid, posix_setpgid,posix_setsid,posix_setuid,posix_strerror,posix_times,posix_ttyname,posix_uname
#在386行 列出PHP可以禁用的函数,如果某些程序需要用到这个函数,可以删除,取消禁用。
expose_php = Off #在432行 禁止显示php版本的信息
magic_quotes_gpc = On #在745行 打开magic_quotes_gpc来防止SQL注入
open_basedir = .:/tmp/ #在380行,设置表示允许访问当前目录(即PHP脚本文件所在之目录)和/tmp/目录,可以防止php木马跨站,如果改了之后安装程序有问题,可注销此行,或者直接写上程序目录路径/var/www/html/www.osyunwei.com/:/tmp/
ctrl+o #保存
ctrl+x #退出
系统运维 www.osyunwei.com 温馨提醒:qihang01原创内容版权所有,转载请注明出处及原文链接
三、配置php-fpm
cp /etc/php5/fpm/pool.d/www.conf /etc/php5/fpm/pool.d/www.confbak #备份原有配置文件
nano /etc/php5/fpm/pool.d/www.conf #编辑
user = www-data #修改用户为www-data
group = www-data #修改组为www-data
ctrl+o #保存
ctrl+x #退出
/etc/init.d/mysql restart #重启MySql
/etc/init.d/nginx restart #重启nginx
/etc/init.d/php5-fpm restart #重启php-fpm
测试篇
cd /usr/share/nginx/html/ #进入nginx默认网站根目录
rm -rf /usr/share/nginx/html/* #删除默认测试页
nano index.php #新建index.php文件
<?php
phpinfo();
?>
ctrl+o #保存
ctrl+x #退出
chown www-data.www-data /usr/share/nginx/html/ -R #设置目录所有者
chmod 700 /usr/share/nginx/html/ -R #设置目录权限
在客户端浏览器输入服务器IP地址,可以看到相关的配置信息!
#############################################################################
备注:
nginx默认站点目录是:/usr/share/nginx/html/
权限设置:chown www-data.www-data /usr/share/nginx/html/ -R
MySQL数据库目录是:/var/lib/mysql
权限设置:chown mysql.mysql -R /var/lib/mysql

 ②190706903 ③203744115


为什么按以上步骤弄完后是403呢?
查看目录权限
看文档的时候细心点