


说明:配置之前先把域名解析到服务器IP地址上
站点1:bbs.osyunwei.com 程序所在目录/data/osyunwei/bbs
站点2:sns.osyunwei.com 程序所在目录/data/osyunwei/sns
chown www.www /data/osyunwei/ -R #设置目录所有者,www为nginx运行账户
chmod 700 /data/osyunwei/ -R #设置目录权限
系统运维 www.osyunwei.com 温馨提醒:qihang01原创内容©版权所有,转载请注明出处及原文链接
nginx配置文件路径:/usr/local/nginx/conf/nginx.conf
修改之前先备份原来的配置文件cp /usr/local/nginx/conf/nginx.conf /usr/local/nginx/conf/nginx.confbak
一、禁止nginx空主机头
vi /usr/local/nginx/conf/nginx.conf #编辑
找到server,在上面一行添加如下内容:
##############################
server {
listen 80 default;
server_name _;
location / {
root html;
return 404;
}
location ~ /.ht {
deny all;
}
}
##############################
这样设置之后,空主机头访问会直接跳转到nginx404错误页面。
二、添加nginx虚拟主机包含文件
cd /usr/local/nginx/conf/ #进入nginx安装目录
mkdir vhost #建立虚拟目录
vi /usr/local/nginx/conf/nginx.conf #编辑
找到上一步添加的代码,在最后添加如下内容:
include vhost/*.conf;
例如:
##############################
server {
listen 80 default;
server_name _;
location / {
root html;
return 404;
}
location ~ /.ht {
deny all;
}
}
include vhost/*.conf;
##############################
三、修改nginx连接fastcgi的方式为unix domain socket
touch /tmp/php-cgi.sock #建立php-cgi.sock文件
chown www.www /tmp/php-cgi.sock #设置文件所有者为www(必须与nginx的用户一致)
vi /usr/local/nginx/conf/nginx.conf #编辑nginx配置文件
fastcgi_pass 127.0.0.1:9000; 修改为
fastcgi_pass unix:/tmp/php-cgi.sock;
vi /usr/local/php5/etc/php-fpm.conf #编辑php-fpm配置文件
listen = 127.0.0.1:9000 修改为
listen =/tmp/php-cgi.sock;
四、修改好之后的/usr/local/nginx/conf/nginx.conf配置文件如下(建议直接使用这个修改好的文件)
user  www www;
worker_processes  2;
#error_log  logs/error.log;
#error_log  logs/error.log  notice;
#error_log  logs/error.log  info;
#pid        logs/nginx.pid;

events {
use epoll;
worker_connections  65535;
}

http {
include       mime.types;
default_type  application/octet-stream;

#log_format  main  '$remote_addr - $remote_user [$time_local] "$request" '
#                  '$status $body_bytes_sent "$http_referer" '
#                  '"$http_user_agent" "$http_x_forwarded_for"';

#access_log  logs/access.log  main;
server_names_hash_bucket_size 128;
client_header_buffer_size 32k;
large_client_header_buffers 4 32k;
client_max_body_size 300m;
sendfile        on;
tcp_nopush     on;
fastcgi_connect_timeout 300;
fastcgi_send_timeout 300;
fastcgi_read_timeout 300;
fastcgi_buffer_size 64k;
fastcgi_buffers 4 64k;
fastcgi_busy_buffers_size 128k;
fastcgi_temp_file_write_size 128k;
#keepalive_timeout  0;
keepalive_timeout  60;
tcp_nodelay on;
server_tokens off;
gzip  on;
gzip_min_length  1k;
gzip_buffers     4 16k;
gzip_http_version 1.1;
gzip_comp_level 2;
gzip_types       text/plain application/x-javascript text/css application/xml;
gzip_vary on;
server {
listen       80 default;
server_name  _;
location / {
root   html;
return 404;
}
location ~ /.ht {
deny  all;
}
}
server
{
listen       80;
#server_name localhost;
index index.php default.php index.html index.htm default.html default.htm ;
root /data/osyunwei;
location ~ .*\.(php|php5)?$
{
fastcgi_pass  unix:/tmp/php-cgi.sock;
fastcgi_index index.php;
include fcgi.conf;
}
location /status {
stub_status on;
access_log   off;
}

location ~ .*\.(gif|jpg|jpeg|png|bmp|swf)$
{
expires      30d;
}
location ~ .*\.(js|css)?$
{
expires      12h;
}

access_log off;
}

include  vhost/*.conf;
}
五、创建fcgi.conf配置文件
vi /usr/local/nginx/conf/fcgi.conf #添加以下内容
系统运维 www.osyunwei.com 温馨提醒:qihang01原创内容©版权所有,转载请注明出处及原文链接
fastcgi_param  GATEWAY_INTERFACE  CGI/1.1;
fastcgi_param  SERVER_SOFTWARE    nginx/$nginx_version;

fastcgi_param  QUERY_STRING       $query_string;
fastcgi_param  REQUEST_METHOD     $request_method;
fastcgi_param  CONTENT_TYPE       $content_type;
fastcgi_param  CONTENT_LENGTH     $content_length;

fastcgi_param  SCRIPT_FILENAME    $document_root$fastcgi_script_name;
fastcgi_param  SCRIPT_NAME        $fastcgi_script_name;
fastcgi_param  REQUEST_URI        $request_uri;
fastcgi_param  DOCUMENT_URI       $document_uri;
fastcgi_param  DOCUMENT_ROOT      $document_root;
fastcgi_param  SERVER_PROTOCOL    $server_protocol;

fastcgi_param  REMOTE_ADDR        $remote_addr;
fastcgi_param  REMOTE_PORT        $remote_port;
fastcgi_param  SERVER_ADDR        $server_addr;
fastcgi_param  SERVER_PORT        $server_port;
fastcgi_param  SERVER_NAME        $server_name;

# PHP only, required if PHP was built with --enable-force-cgi-redirect
fastcgi_param  REDIRECT_STATUS    200;
六、创建虚拟主机配置文件
vi /usr/local/nginx/conf/vhost/bbs.osyunwei.com.conf #添加以下内容
server
{
listen       80;
server_name bbs.osyunwei.com;
index index.php index.html index.htm default.html default.htm default.php;
root  /data/osyunwei/bbs;
location ~ .*\.(php|php5)?$
{
fastcgi_pass  unix:/tmp/php-cgi.sock;
fastcgi_index index.php;
include fcgi.conf;
}
location /status {
stub_status on;
access_log   off;
}

location ~ .*\.(gif|jpg|jpeg|png|bmp|swf)$
{
expires      30d;
}
location ~ .*\.(js|css)?$
{
expires      12h;
}

access_log off;
}
vi /usr/local/nginx/conf/vhost/sns.osyunwei.com.conf #添加以下内容
server
{
listen       80;
server_name sns.osyunwei.com;
index index.php index.html index.htm default.html default.htm default.php;
root  /data/osyunwei/sns;
location ~ .*\.(php|php5)?$
{
fastcgi_pass  unix:/tmp/php-cgi.sock;
fastcgi_index index.php;
include fcgi.conf;
}
location /status {
stub_status on;
access_log   off;
}

location ~ .*\.(gif|jpg|jpeg|png|bmp|swf)$
{
expires      30d;
}
location ~ .*\.(js|css)?$
{
expires      12h;
}

access_log off;
}
七、测试
vi /data/osyunwei/bbs/index.php #新建文件,添加以下内容
<?php
phpinfo();
?>
:wq! #保存退出
vi /data/osyunwei/sns/index.php #新建文件,添加以下内容
<?php
phpinfo();
?>
:wq! #保存退出
/etc/rc.d/init.d/nginx restart #重启nginx
/etc/rc.d/init.d/php-fpm restart #重启php-fpm
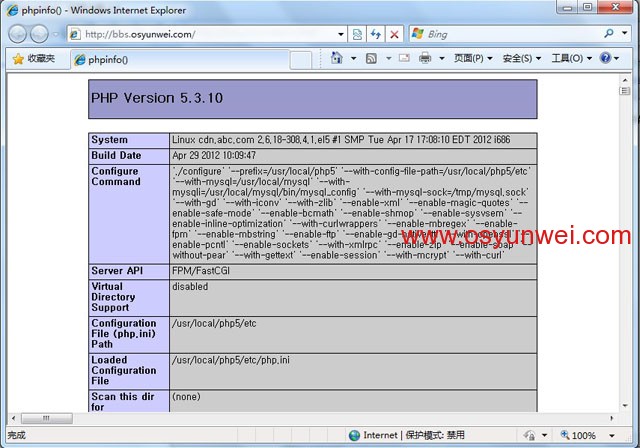
打开
http://bbs.osyunwei.com/
系统运维 www.osyunwei.com 温馨提醒:qihang01原创内容©版权所有,转载请注明出处及原文链接
打开
http://sns.osyunwei.com/

可以看到相关PHP信息页面,说明配置成功。
至此,Nginx虚拟主机配置教程完成

 ②190706903 ③203744115