准备工作
在安装Docker之前,确保已经关闭SELINUX、关闭或卸载firewall、创建了Docker用户组,并且安装了iptables防火墙,系统内核版本为Linux 3.10及其以上版本。
1、关闭selinux
#执行以下命令
setenforce 0
sed -i 's/^SELINUX=.*/SELINUX=disabled/' /etc/selinux/config
2、关闭firewall
systemctl stop firewalld.service #停止firewall
systemctl disable firewalld.service #禁止firewall开机启动
systemctl mask firewalld
systemctl stop firewalld
yum -y remove firewalld
3、添加docker用户组
groupadd docker
#添加普通用户myuser到docker组,使其具有docker命令的执行权限
sudo usermod -aG docker myuser
sudo usermod -aG wheel myuser #添加用户到wheel组,用户可以使用sudo权限
#刷新用户组
newgrp docker
4、安装iptables防火墙
yum -y install iptables-services #安装
systemctl enable iptables.service #设置防火墙开机启动
iptables -F #清空规则
service iptables save #保存配置规则
systemctl restart iptables.service #启动防火墙使配置生效
5、查看内核版本,需要3.10及其以上版本才可以
uname -r
[root@localhost ~]# uname -r
4.19.90-2211.2.0.0176.oe1.x86_64
CentOS使用rpm包升级系统内核
https://www.osyunwei.com/archives/12038.html
6、安装libcgroup,docker依赖库
yum -y install libcgroup
安装篇
1、下载docker安装包
docker下载地址:https://download.docker.com/linux/static/stable/x86_64/
目前最新版本:docker-24.0.4.tgz
Docker-Compose下载地址:https://github.com/docker/compose/releases/download/v2.20.1/docker-compose-linux-x86_64
下载最新版本:docker-compose-linux-x86_64
mkdir -p /data/soft/docker #创建docker安装包存放目录
上传下载好的安装包到/data/soft/docker目录
2、创建docker配置、启动、关闭文件
mkdir -p /data/server/docker #创建docker数据存放目录,默认目录是/var/lib/docker
mkdir -p /data/server/docker/etc #创建docker配置文件放存放目录,默认是/etc/docker/daemon.json
chmod 755 -R /data/server/docker/ #设置权限
2.1创建启动文件
vi /data/soft/docker/docker.service #编辑
[Unit]
Description=Docker Application Container Engine
Documentation=https://docs.docker.com
After=network-online.target firewalld.service
Wants=network-online.target
[Service]
Type=notify
# the default is not to use systemd for cgroups because the delegate issues still
# exists and systemd currently does not support the cgroup feature set required
# for containers run by docker
ExecStart=/usr/bin/dockerd --data-root=/data/server/docker --config-file=/data/server/docker/etc/daemon.json
ExecReload=/bin/kill -s HUP $MAINPID
# Having non-zero Limit*s causes performance problems due to accounting overhead
# in the kernel. We recommend using cgroups to do container-local accounting.
LimitNOFILE=infinity
LimitNPROC=infinity
LimitCORE=infinity
# Uncomment TasksMax if your systemd version supports it.
# Only systemd 226 and above support this version.
#TasksMax=infinity
TimeoutStartSec=0
# set delegate yes so that systemd does not reset the cgroups of docker containers
Delegate=yes
# kill only the docker process, not all processes in the cgroup
KillMode=process
# restart the docker process if it exits prematurely
Restart=on-failure
StartLimitBurst=3
StartLimitInterval=60s
[Install]
WantedBy=multi-user.target
:wq! #保存退出
2.2、配置docker镜像加速
由于Docker Hub的服务器在国外,下载docker镜像比较慢,我们可以配置国内的镜像地址,这样下载docker镜像速度就会很快。
vi /data/soft/docker/daemon.json #配置docker镜像加速
{
"registry-mirrors" : [
"https://t1fyrekt.mirror.aliyuncs.com",
"http://hub-mirror.c.163.com",
"https://mirror.baidubce.com"
],
"insecure-registries" : [
"hub-mirror.c.163.com",
"t1fyrekt.mirror.aliyuncs.com"
],
"debug" : true,
"experimental" : true
}
:wq! #保存退出
3、创建安装脚本
vi /data/soft/docker/install.sh #创建安装脚本
#!/bin/bash
echo '解压docker安装包'
cd /data/soft/docker
tar -zxvf $1
echo '将docker目录移动到/usr/bin目录下'
mv docker/* /usr/bin
echo '将docker.service 移到/usr/lib/systemd/system/ 目录'
cp docker.service /usr/lib/systemd/system/
echo '将配置文件daemon.json移到/data/server/docker/etc/目录'
cp daemon.json /data/server/docker/etc/
echo '添加文件执行权限'
chmod +x /usr/lib/systemd/system/docker.service
echo '重新加载配置文件'
systemctl daemon-reload
echo '启动docker'
systemctl start docker.service
echo '设置开机自启'
systemctl enable docker.service
echo 'docker安装成功'
:wq! #保存退出
chmod +x /data/soft/docker/install.sh #添加执行权限
说明:
在Linux系统中,/usr/bin目录是用于存放用户可执行的命令或程序的标准目录之一。
将Docker的可执行文件拷贝到/usr/bin目录下是为了方便用户在任何位置都可以直接执行Docker命令,而不需要指定完整的路径。
/usr/bin目录是用于存放系统范围的可执行文件的标准目录,包括Docker的二进制文件和其他重要组件。对此目录进行任意更改可能会导致Docker无法正常运行或引发系统稳定性问题。
4、安装docker
cd /data/soft/docker
sh install.sh docker-24.0.4.tgz
systemctl daemon-reload #重新加载配置
systemctl restart docker.service #重启docker
docker info #检查docker镜像加速器是否配置成功
5、测试docker是否可用
docker search nginx #查找Docker Hub上的nginx镜像
docker pull hello-world #下载一个镜像实例
docker run hello-world #运行一个镜像实例
docker images hello-world #查看该镜像的信息
6、安装Docker-Compose
Docker-Compose是docker提供的一个命令行工具,用来定义和运行由多个容器组成的应用。
使用Docker-Compose,我们可以通过yaml文件定义应用程序的各个服务,并由单个命令完成应用的创建和启动。
Docker-Compose依靠Docker进行工作,必须确保已经安装了docker才能安装Docker-Compose
#把docker-compose安装在/usr/bin/目录下
#拷贝Docker-Compose到/usr/bin目录
cp /data/soft/docker/docker-compose-linux-x86_64 /usr/bin/docker-compose
#添加执行权限
chmod +x /usr/bin/docker-compose
#查看版本
docker-compose --version
7、使用docker部署应用
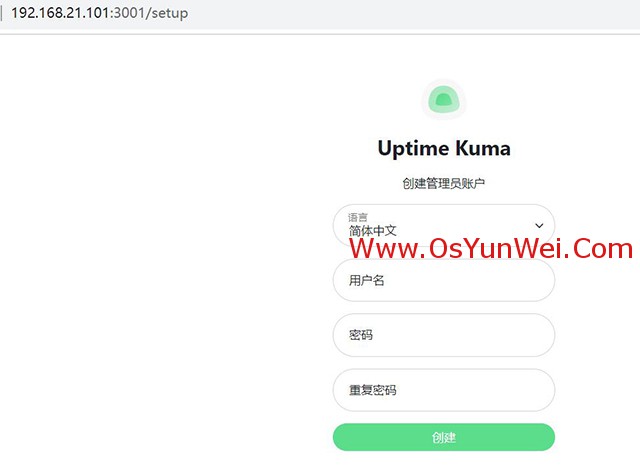
部署服务监控工具 uptime-kuma
# Create a volume 创建卷
# 该命令将创建一个名为"uptime-kuma"的卷,用于持久化存储容器中的数据。
docker volume create uptime-kuma
# Start the container 启动容器
# 以后台模式启动一个名为"uptime-kuma"的容器,映射主机的端口3001到容器的端口3001,并将"uptime-kuma"卷挂载到容器的"/app/data"目录下。它使用了镜像"louislam/uptime-kuma:1"。
docker run -d --restart=always -p 3001:3001 -v uptime-kuma:/app/data --name uptime-kuma louislam/uptime-kuma:1
Browse to http://localhost:3001 after started.

# 您可以将"<YOUR_PORT>"替换为您希望使用的主机端口号,将"<YOUR_DIR OR VOLUME>"替换为您要挂载的本地目录或卷名称。
请注意,只能使用本地卷进行挂载,其他类型如NFS是不被支持的。
Change Port and Volume
docker run -d --restart=always -p <YOUR_PORT>:3001 -v <YOUR_DIR OR VOLUME>:/app/data --name uptime-kuma louislam/uptime-kuma:1
Please use a local volume only. Other types such as NFS are not supported.
docker ps #查看容器
至此,Linux下安装部署Docker二进制版本完成。

 ②190706903
  ③203744115


